Shopify Connection Guide
Follow these steps to connect your Shopify store to SEEGEA in just a few minutes.
Create an app on the Dev Dashboard
Go to the Shopify Dev Dashboard and click "Create an app" in the top right corner.
Open Dev Dashboard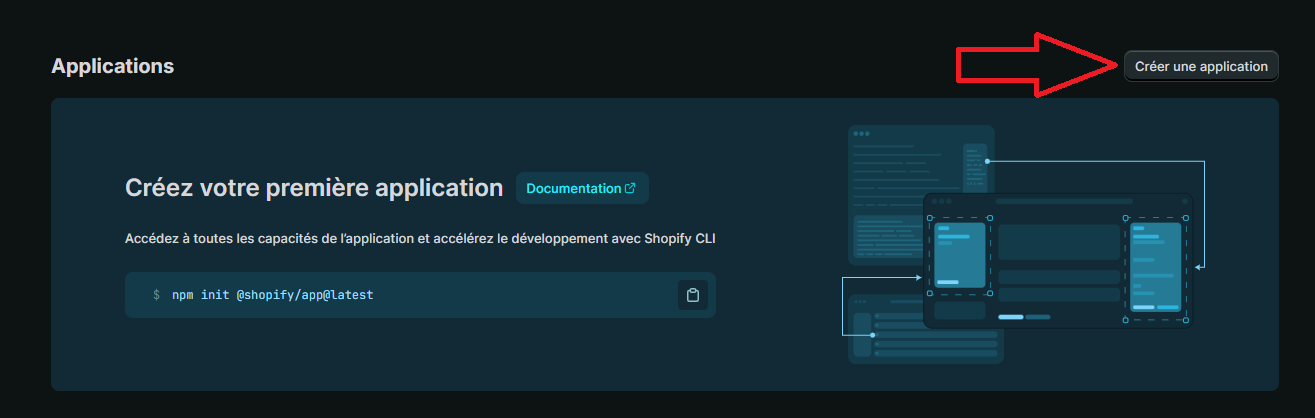
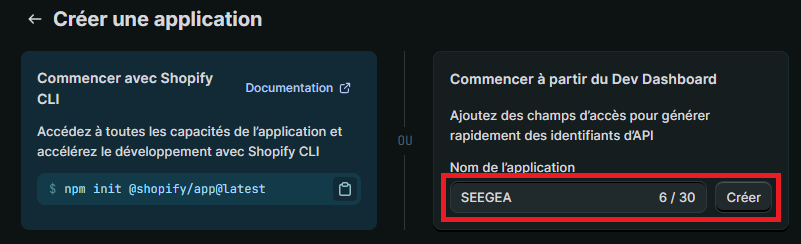
Name the app
Choose "Start from the Dev Dashboard" (on the right), then enter SEEGEA as the app name and click "Create".
Configure the app version
On the "Create version" page, fill in the following fields:
- App name:
SEEGEA - App URL:
https://app.seegea.com - Access scopes: paste the list below
- Everything else: leave empty (Redirect URL, optional scopes, POS, Proxy)
read_products,write_products,read_product_listings,write_product_listings,read_product_feeds,write_product_feeds,read_inventory,write_inventory,read_locations,read_orders,read_files,write_files,read_metaobject_definitions,write_metaobject_definitions,read_metaobjects,write_metaobjects,read_locales,write_locales,read_translations,write_translations,read_channels,read_publications,write_publications,read_analytics,read_reports,read_content,write_content,read_themesImportant: paste this list exactly in the "Access scopes" field. These permissions allow SEEGEA to manage your products, inventory, collections and media.
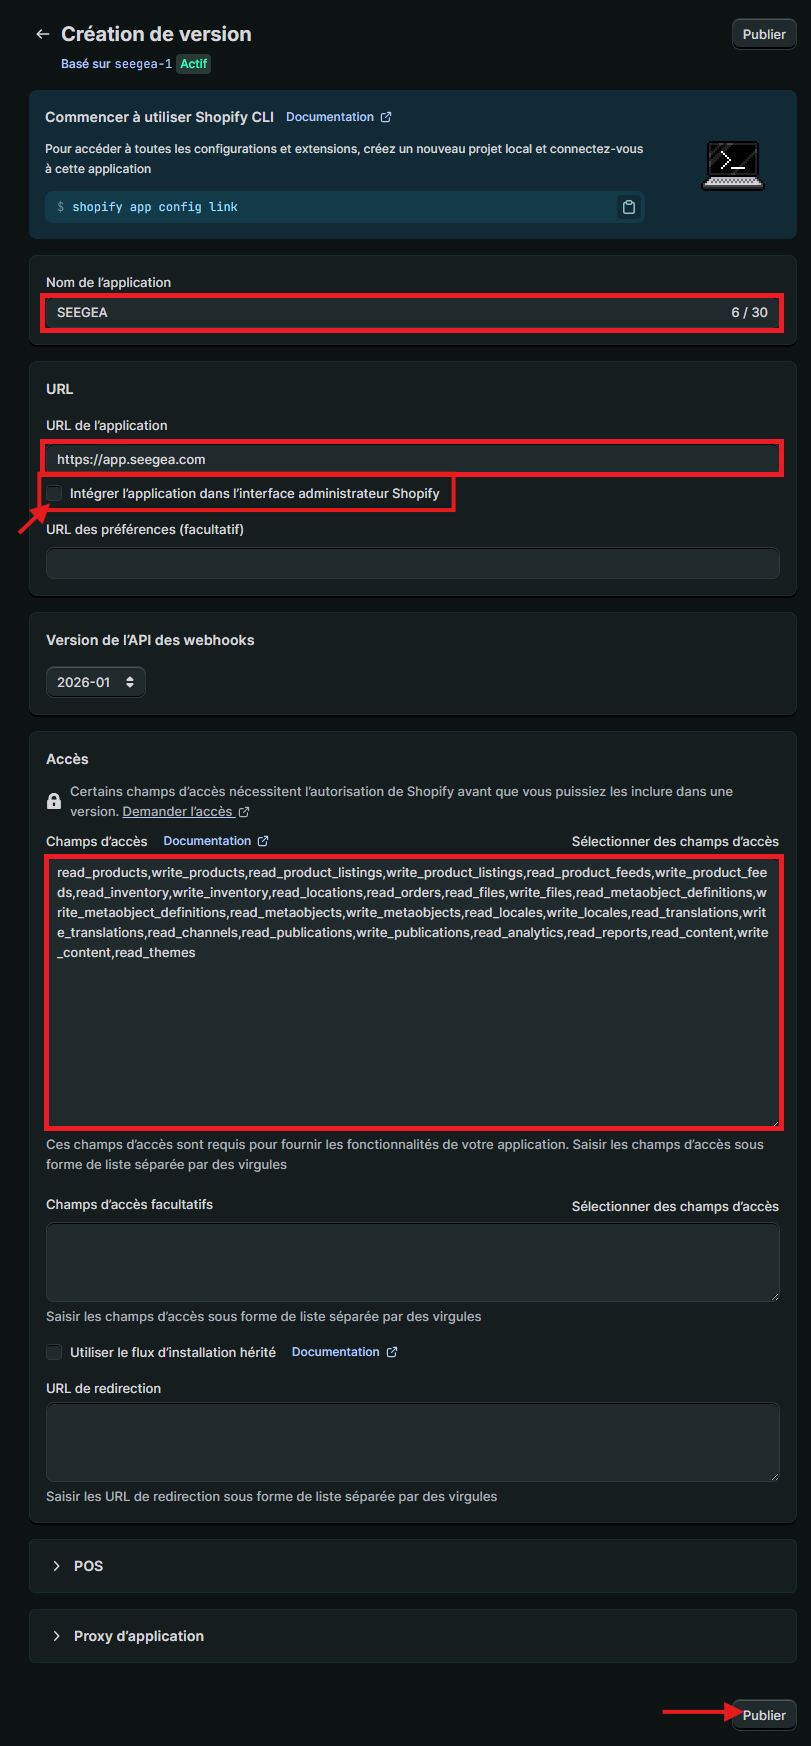
Do NOT check the "Embed app in Shopify admin" box. This option must remain unchecked.
Permission details
Publish the version
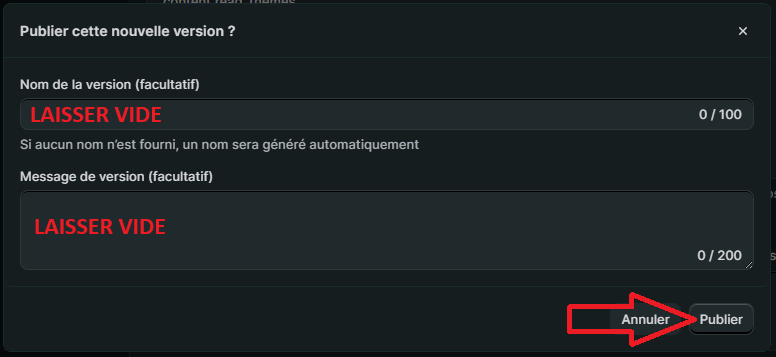
Click "Publish" at the bottom of the page. A window opens to name the version — leave the fields empty and click "Publish" directly.
Install the app on your store
Go back to your app's home page (click "SEEGEA" in the left menu), then click "Install app" in the top right.

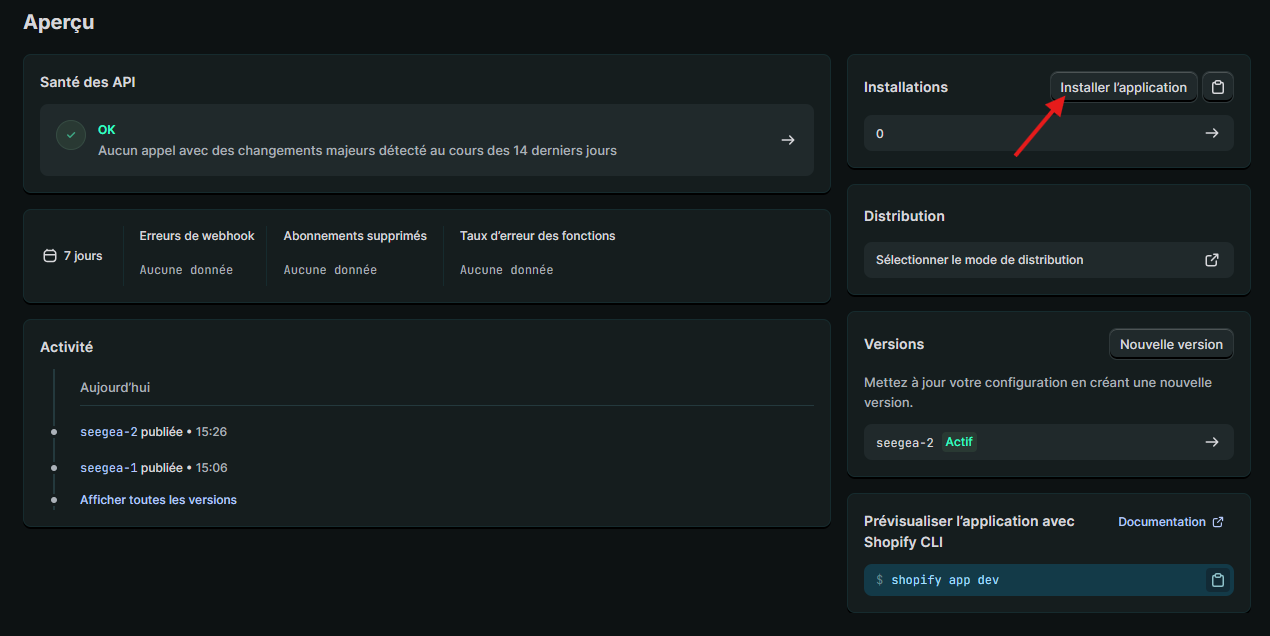
A confirmation window appears with the requested permissions. Click "Install".

Get your Client ID and Client Secret
In the left menu, click "Settings". You'll find your credentials there:

- a.Copy the Client ID (copy button on the right of the field)
- b.Click the eye icon to reveal the Secret, then copy it

Never share your Client Secret publicly. SEEGEA stores it encrypted and never transmits it to third parties.
Connect in SEEGEA
Go back to SEEGEA and fill in the 3 fields:
- Store name: your-store.myshopify.com (or just "your-store")
- Client ID: copied from the previous step
- Client Secret: copied from the previous step
Click "Connect my Shopify store" — SEEGEA will automatically test the connection and import your products.
Connect my storeNeed help? Contact us at support@seegea.com